Sometimes the camera catches some of life’s more unpredictable moments. With the wonders of Fun Face Master we have the ability to make them that much better.
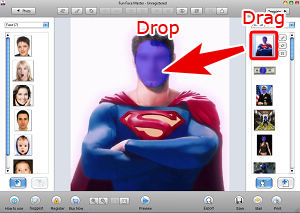
Select and use a Template, Open the Fun Face Master application, Select a template you want, Drag and Drop the template to the editor center.
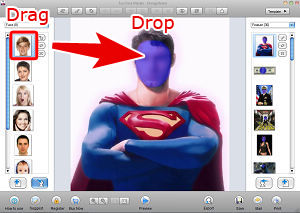
Drag and Drop your Face Photo to Template, Select your Face Photo, Drag the photo and Move the Face zone, Drop the photo to blue zone.
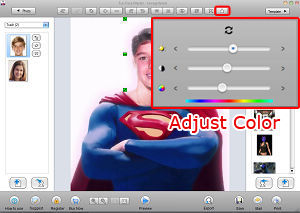
You can Move, Resize, Rotation your Face Photo, and you can adjust the brightness, saturation and hue.
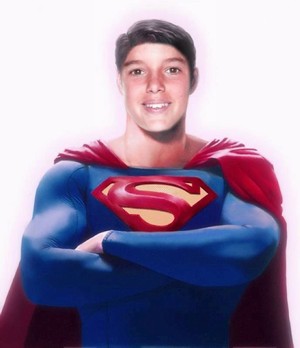
Congratulation!
Now you can save it to your hard disk or put it to internet, such as facebook, blog and etc.
More details please click here

A reader recently emailed me a couple of photographs of her children. Unfortunately, as often happens with small children, one image had two of the three children looking at the camera and smiling and the other image had the exact opposite combination – only one child looking great. Her question was – could she take the good face from one of the images and paste it into the second image.

The answer is yes, and here’s how to do it in Photoshop without any need to cut and paste:
Open both images in Photoshop. Drag the background layer from one image onto the other – in my case I dragged the background layer from the image with two out of the three faces correct and dropped it into the image that has only one good face.
You will have an image with two layers – the top has two good faces and the one below has the other one. Close the other image.
Select both layers in the image that you’re working on and choose Edit > Auto-Align Layers and select Auto.
Photoshop will now align the two layers so that the faces in both layers will be aligned on top of each other. To do this you need to have two images with very little difference between them and this image lined up pretty well as a result.
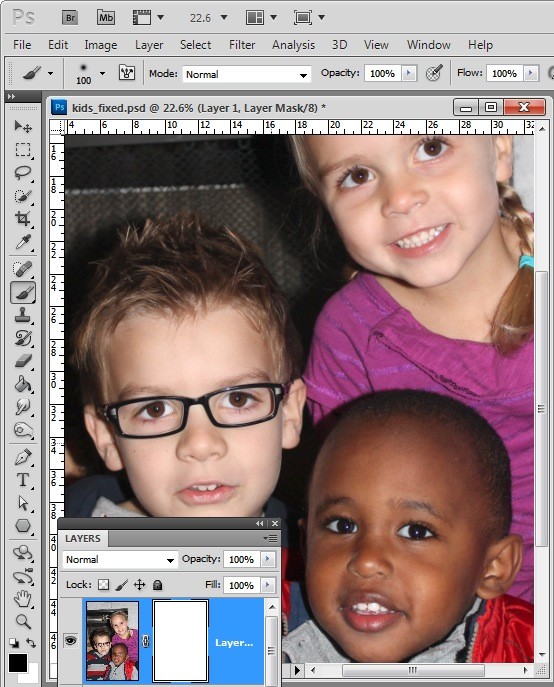
Click on the topmost layer and add a layer mask to it by clicking the Add Layer Mask icon at the foot of the Layers palette.
The mask is filled with white by default which means that the entire contents of the top layer is visible and the bottom layer not visible at all.
Select black as your foreground color and choose a soft edge brush. Target the mask by clicking on it so you’re painting on it and then paint over the child’s face in the image to reveal the face from the layer image below.
You’ll need to make some small choices about how much of the layer below you reveal with the mask – if you take too much you can paint back on the mask with white to reveal the top layer again.
I made some small adjustments around the child’s collar to hide the fix. The red portion of the image shows the mask – I turned this on – it won’t typically be visible to you as you work.
Finish by taking a critical look at the final image and, if necessary, adjust the mask or add a new layer and clone elements from the layers below to fine tune the image.
I had to do a small amount of cloning of the little girl’s shirt to fix a small problem and then I cropped the image and it was complete.
The entire process took all of around ten minutes.
You can get similar results in Photoshop Elements 7 and above by opening the two images and choose File > New > Scene Cleaner and follow the instructions there.
More details please click here
Related Articles:
| How to Swap Face Photo with Fun Face Master | |
| How to use my Face Photo to create Fun Face Photo | |
| How to face swapping in Fun Face Master |